How to Migrate Data From One Windows User Account
Manually migrating a user over from an old profile to a new one can be a huge pain. Not only do you have to track down all their old data and copy it to their new profile, you also have to reconfigure all of their programs and Windows settings to their liking. Microsoft offers no easy way to do this but luckily someone else has created a tool that makes this a fairly painless process. In the following article I would like to show you how to use it.
Introduction
Yes, migrating a user over from an old profile to a new one can be a huge pain when you have to do it manually. Thanks to the handy tool I show you here, you won’t need to do it manually again.
The Software – User Profile Wizard
User Profile Wizard is a powerful workstation migration tool that works great when you need to:
- Migrate a user from a local account to a domain account.
- Migrate a user from a domain account to a local account.
- Migrate a user from one local account to another.
- Migrate a user from one domain account to another.
It copies all of the data and settings from the old profile into the new one making the new profile exactly like the old one. It’s available in 3 different editions but in the following tutorial I will be showing you how to use the free personal edition which is designed for individual workstation migrations.
Step 1 – Log in to the New Account
The first step is to make sure that you have logged in to the new account that you want to migrate the user to at least once so the default profile is created.
If you are migrating a user from a domain account to a local account then you will need to first remove the workstation from the domain. Make sure that you know the password to a local account that has administrator rights. Log in to that account and create the new local account that you want to use. Then log in to your new local user account.
If you are migrating a user from a local account to a domain account then go ahead and add the computer to the domain and log in to to your new user account.
If you are migrating from one local account to another or one domain account to another then create the new user account and log in to it.
Step 2 – Download and Run the software
Download User Profile Wizard Personal Edition from the link, and then run it.
Step 3 – Run the User Profile Wizard
Once the program launches, you should see a welcome screen. Click Next.
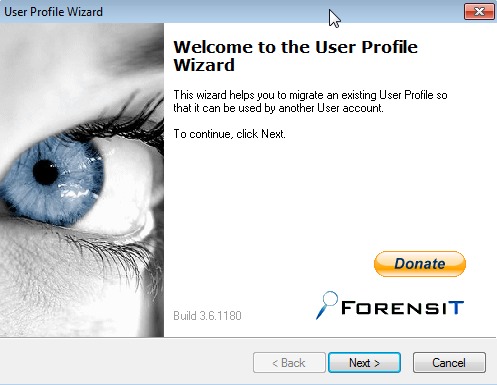
Transfer Windows User Data using User Profile Wizard
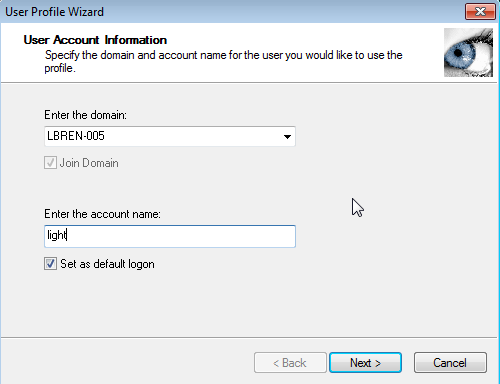
Step 4 -Type in the Domain (or Machine name)
Enter the domain that contains the new user account. If the new account is a local user account then enter the machine name instead. Either way, it should auto-populate in the list. Then enter the name of the new user account and click Next.
Step 5 – Select the Windows User Profile to Transfer
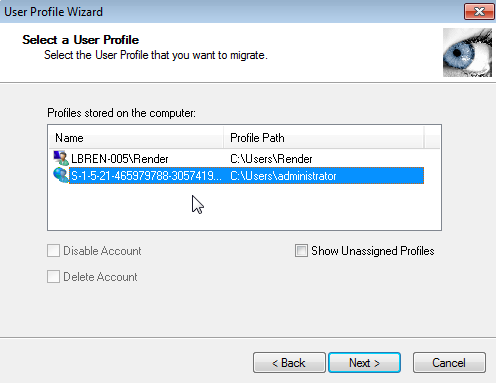
Now pick the old profile that you want to migrate from. Since my workstation is no longer on the domain, User Profile Wizard sees the old profile name as a string of letters and numbers. This is normal in this situation. In others, you should see the actual name of the old profile that you want to copy the settings from. Select it and then click Next.
Step 6 – Allow the Migration of User Data to occur
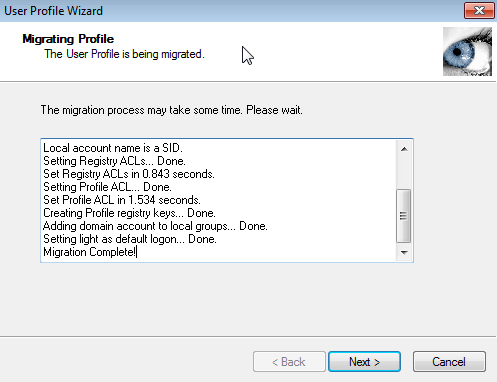
The migration will now start. The length of time depends on the amount of data needs copying over. Once it’s done, click Next.
Step 7 – Finish (Log out and Back in)
Your migration is now complete and you can click Finish. If you are logged in to the new account then you will need to log out and back in before the settings take effect.
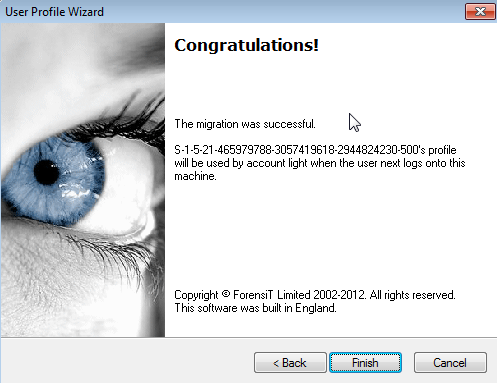
Summary of How to Migrate Windows User Data to Another Account
I’ve shown you step by step how to migrate old user data to a new profile using software that makes it easy for you.

Leave A Response